How to Build an LTO (Lease-to-Own)
BitLease provides a structured pathway to digital asset ownership. We replace the uncertainty of market timing with a predictable, contract-defined framework. Ownership is not defined by timing or impulse. It is achieved through progression and completion.
Our platform operates on a simple, transparent process broken down into three distinct stages: Lease, Use, and Own. This guide explains how each stage works to secure your digital assets safely and predictably.
LTO is the core BitLease product: pick a pair, set your down payment, choose a schedule, and sign — you gain economic ownership of the asset from day one.
Step 1 — Build your pair
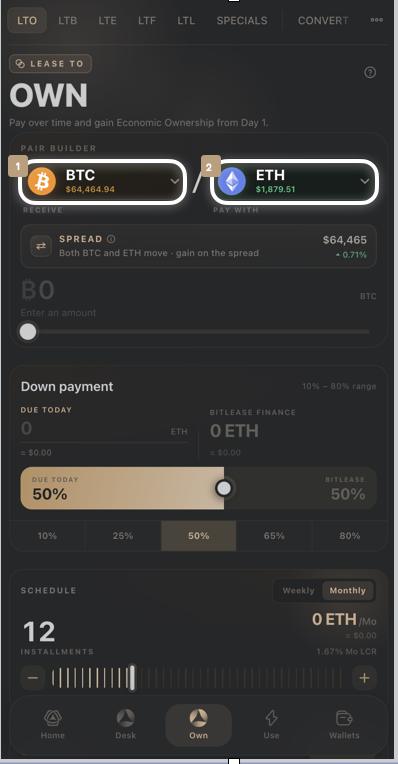
From the Own tab, make sure LTO is selected at the top.
In Pair Builder, choose what you want to Receive (1) and what you'll Pay With (2). The card below shows whether the deal is Obligation-led — meaning one side of the pair stays stable while the other side is what moves in value.
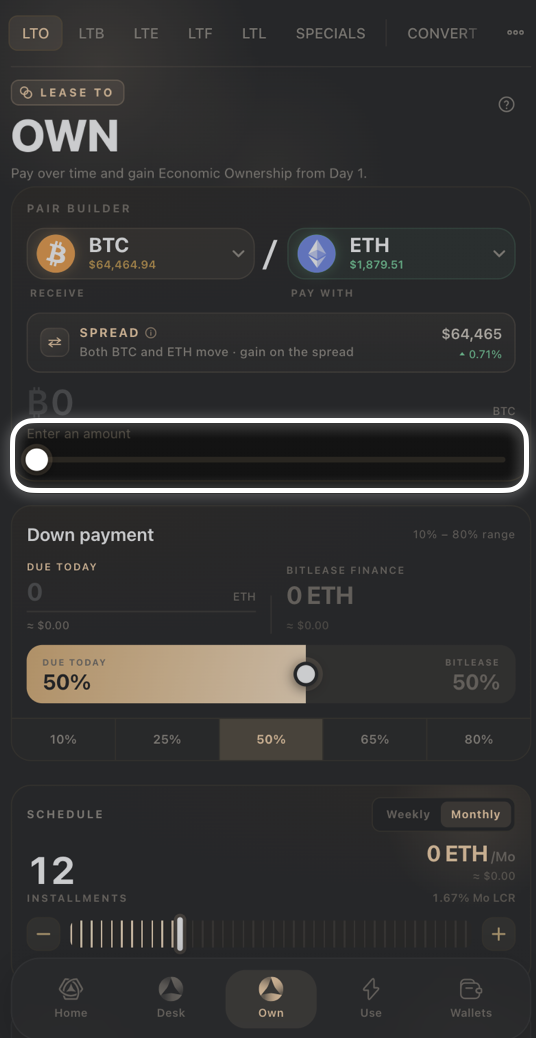
Enter an amount using the slider, or type it directly.
Step 2 — Set your down payment
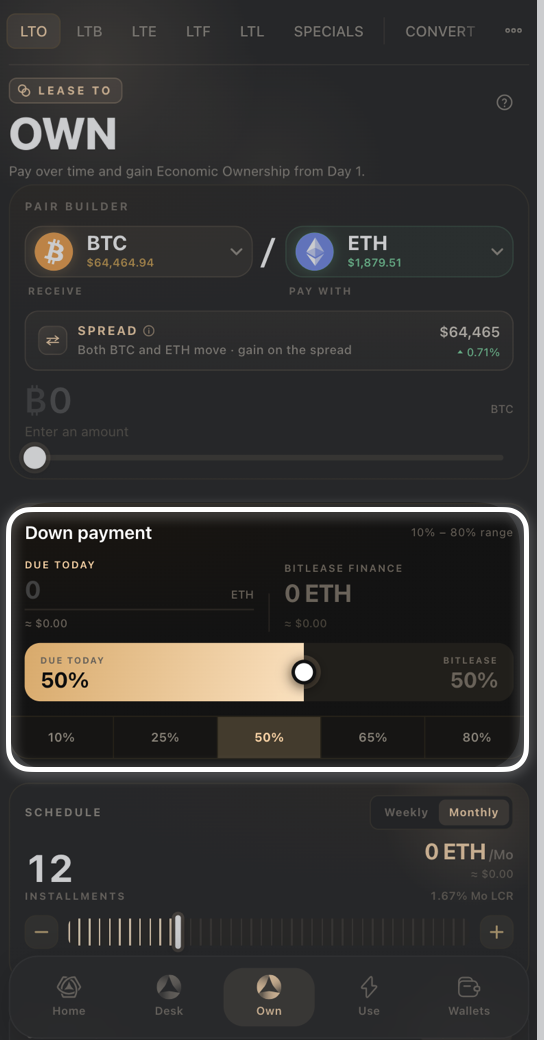
Drag the Down Payment slider, or tap one of the presets (10%, 25%, 50%, 65%, 80%).
Due Today shows what you pay now; BitLease Finance shows the portion BitLease covers.
Step 3 — Choose your schedule
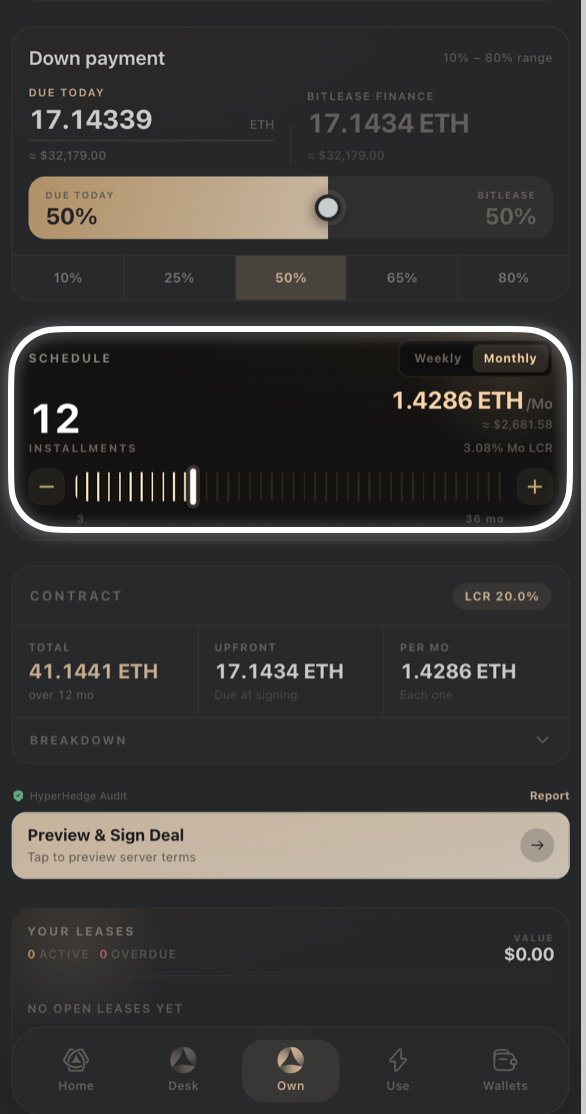
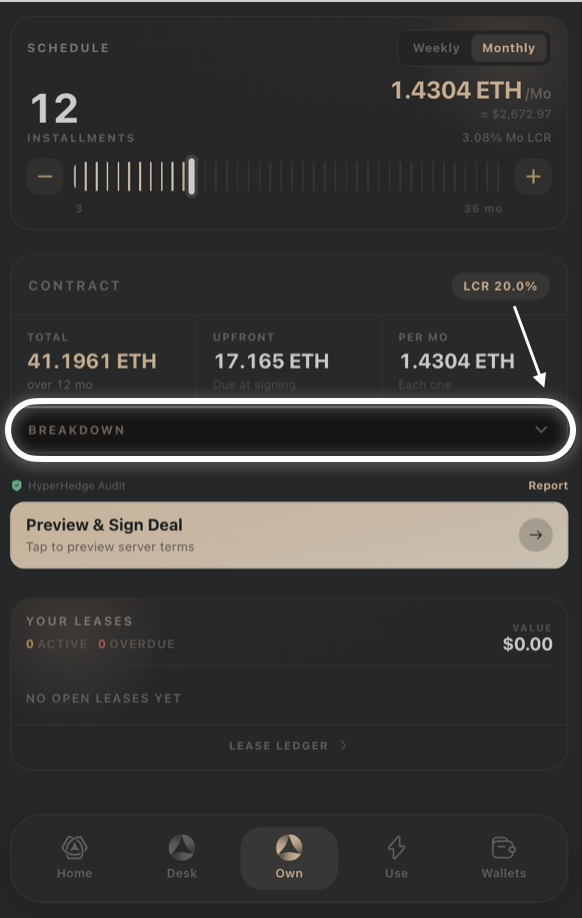
Toggle Weekly or Monthly.
Use the Installments slider (3 to 36 months) or the +/- buttons to set how many payments you'll make. Your per-installment amount updates live, along with the Mo LCR (Lease Cost Ratio) shown next to it.
Step 4 — Review your contract
The Contract card shows your Total, Upfront, and Per Mo amounts, plus the deal's overall LCR. Tap Breakdown to expand the full fee-by-fee math:
Principal — quantity × execution price
Down payment — your chosen % of principal, due at signing
Origination fee — a percentage of principal
Financed amount — principal minus down payment
Finance charge — the annual rate applied to your financed amount
HyperHedge fee — the annual hedging cost applied to your financed amount
Total fees — origination + finance charge + HyperHedge, due at settlement
Total obligation — principal plus total fees
Monthly payment — financed amount divided across your installments
Step 5 — Preview & sign
Check the HyperHedge Audit indicator above the button — tap Report if you want the underlying detail.
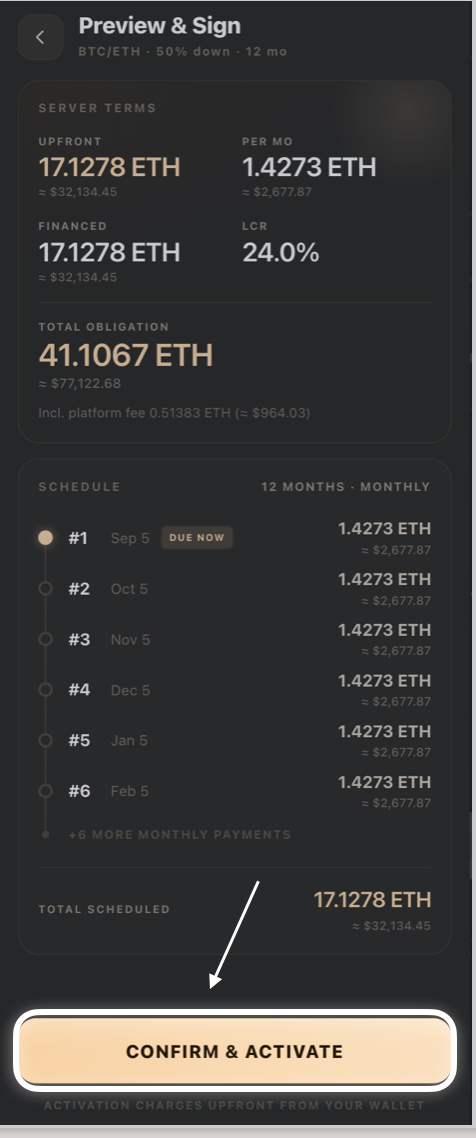
Tap Preview & Sign Deal.
The Preview & Sign screen recalculates your terms. Review everything one more time, then confirm to sign.
Tracking your lease
Once signed, your position appears under Your Leases at the bottom of the LTO tab, showing how many are Active, how many are Overdue, and their combined Value. Tap Lease Ledger for the full transaction history.
Good to know:
The down payment range is always 10%–80%; BitLease finances the rest.
If Preview & Sign shows "Preview failed," see Troubleshooting Your Deal in this category before retrying.
Need Help?
If you encounter issues during account creation, contact BitLease Support:
Email: support@bitlease.com
Subject: "LTO Builder Issue"
Include: A description of the problem, any error messages, and steps you've already tried.
Response Time: Within 24 hours.
For urgent security concerns, email: security@bitlease.com.
Related articles: A Tour of the Own Tab · How to Build an LTB (Lease-to-Bundle) · Troubleshooting Your Deal